ColourlessTransformer is an interface for Paint Transformer that I made using Streamlit.
Paint Transformer
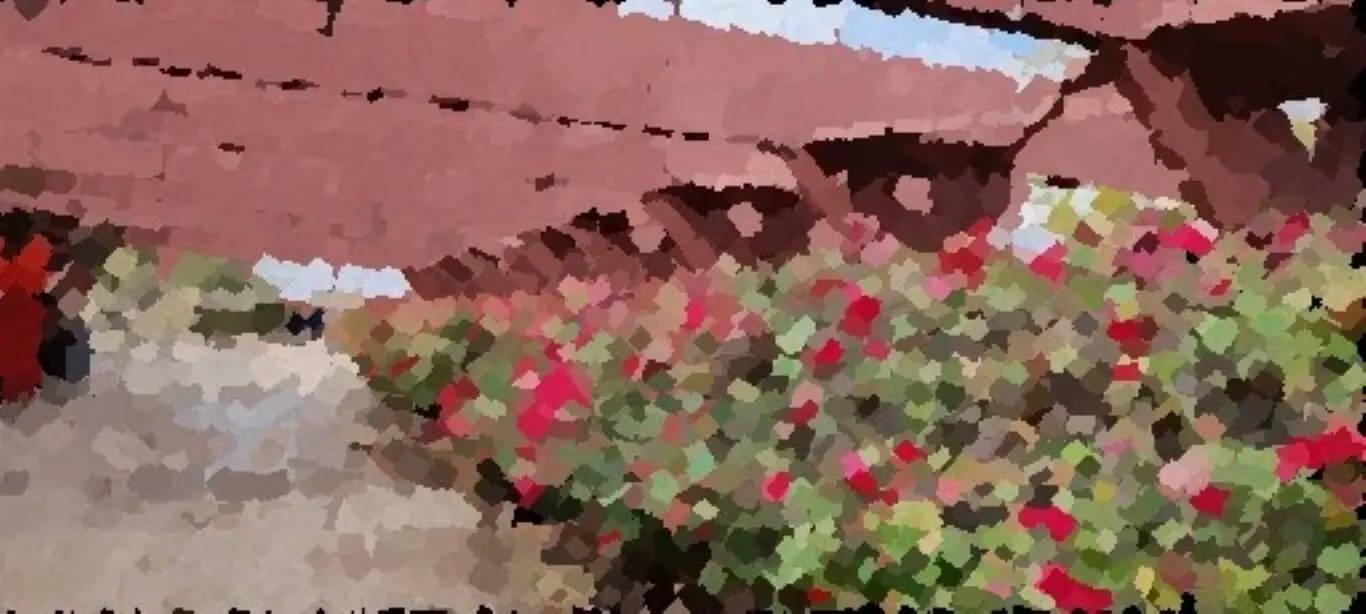
Paint Transformer is a program that approximates images using paint strokes. This gives the image a stylized watercolour/painterly aesthetic that I personally think looks quite nice.
Paint Transformer was developed in this research paper by a team of researchers (notably not including me). ColourlessTransformer uses this pre-trained model created by Songhua Liu (one of the authors of the paper).
How it works
Paint Transformer starts with an empty canvas of the same size as the input image. Then, it chooses a position somewhere on the canvas, usually in the top right quadrant. It feeds the input image and the position it chose into to a neural network and "asks" the neural network for the rotation, colour, and size of a single brush stroke that would result in the canvas looking closest to the input image. The neural network, predictably, responds with a brush stroke that covers most of the canvas and is approximately the same colour as the average colour of the image. Paint Transformer uses the neural network's response and pastes a PNG of a brush stroke onto the canvas with the specified position, colour, rotation, and size. The canvas doesn't look much like the input image at this stage, but in fairness there's only so much you can do with a single brush stroke.
Then Paint Transformer chooses another position on the canvas and asks the neural network for the rotation, colour, and size of another brush stroke, which it will then paste on top of the first brush stroke. The neural network responds with a slightly smaller brush stroke with a colour that represents a more localized portion of the canvas. Now, with two brush strokes, the canvas still doesn't look much like the input image, but it does look a bit better.
Then it repeats this process many more times. A lot more. The exact iteration count depends on the size of the image, but for a 512 pixel by 512 pixel image, Paint Transformer adds 2,728 brush strokes. After so many brush strokes, the canvas starts to resemble the input image pretty closely, but with some visible artifacts and stroke edges. These artifacts are the whole point: they make the image look kind of pretty.
This sounds like AI art...
It is. Kind of. There's ambiguity about whether Paint Transformer counts as generative AI.
On the one hand, Paint Transformer works pretty similarly to diffusion-based AI image generators (e.g. Midjourney and DALL-E) in that they all start with an empty image (technically, diffusion-based generators start with Gaussian noise, but that's besides the point) that they iteratively refine into a non-vacuous image via a neural network.
But on the other hand, Midjourney is far larger and more powerful than Paint Transformer and it can create truly novel material rather than just making an existing image look slightly different. On the scale between Midjourney and a simple Photoshop filter, Paint Transformer is somewhere in the middle.
The Interface
The Paint Transformer documentation suggests three ways to use it: a Huggingface Space, a mobile app, and a Colab Notebook. The Huggingface Space immediately throws a runtime error and doesn't work, the mobile app is exclusively available on the Baidu app store (which can only be accessed in mainland China), and the Colab notebook is functional but hard to use and inconvenient.
None of the official interfaces were viable options for me, so I decided to make my own custom interface.
Choosing a Framework
At the time, I didn't have much experience building websites, so I wanted to use a Python framework that included premade UI components so I didn't have to write HTML or CSS (I've since moved past this aversion).
"I want a Python web framework with premade UI components" is a fairly common request in the Python community, so there are lots of available options. The most widely-used one is Gradio, which is what I used to make my first prototype. However, the prototype took around 2 minutes to start up each time, which to me seemed excessive. The main reason it was so slow is that Gradio is a very powerful and heavy framework. This is useful for complex applications where Gradio's featureset is useful, but all I needed was a way to drag-and-drop an image and display the output.
So I rewrote the app in Streamlit, which is a much lighter and (in my opinion) nicer framework.
Naming it
At the time, my GitHub username was "ColourlessSpearmint" (it's a reference to a book), so I decided to name my custom interface "ColourlessTransformer".
Usage
First, install Git and install uv if you haven't already. Next, run the following commands:
git clone https://github.com/ethmarks/ColourlessTransformer.git
cd ColourlessTransformer
uv sync
uv run main.py
This will download ColourlessTransformer, install the dependencies, start the Streamlit server, and open it in your browser. uv will handle all of the PyTorch stuff automatically and install the right version for your GPU or CPU.
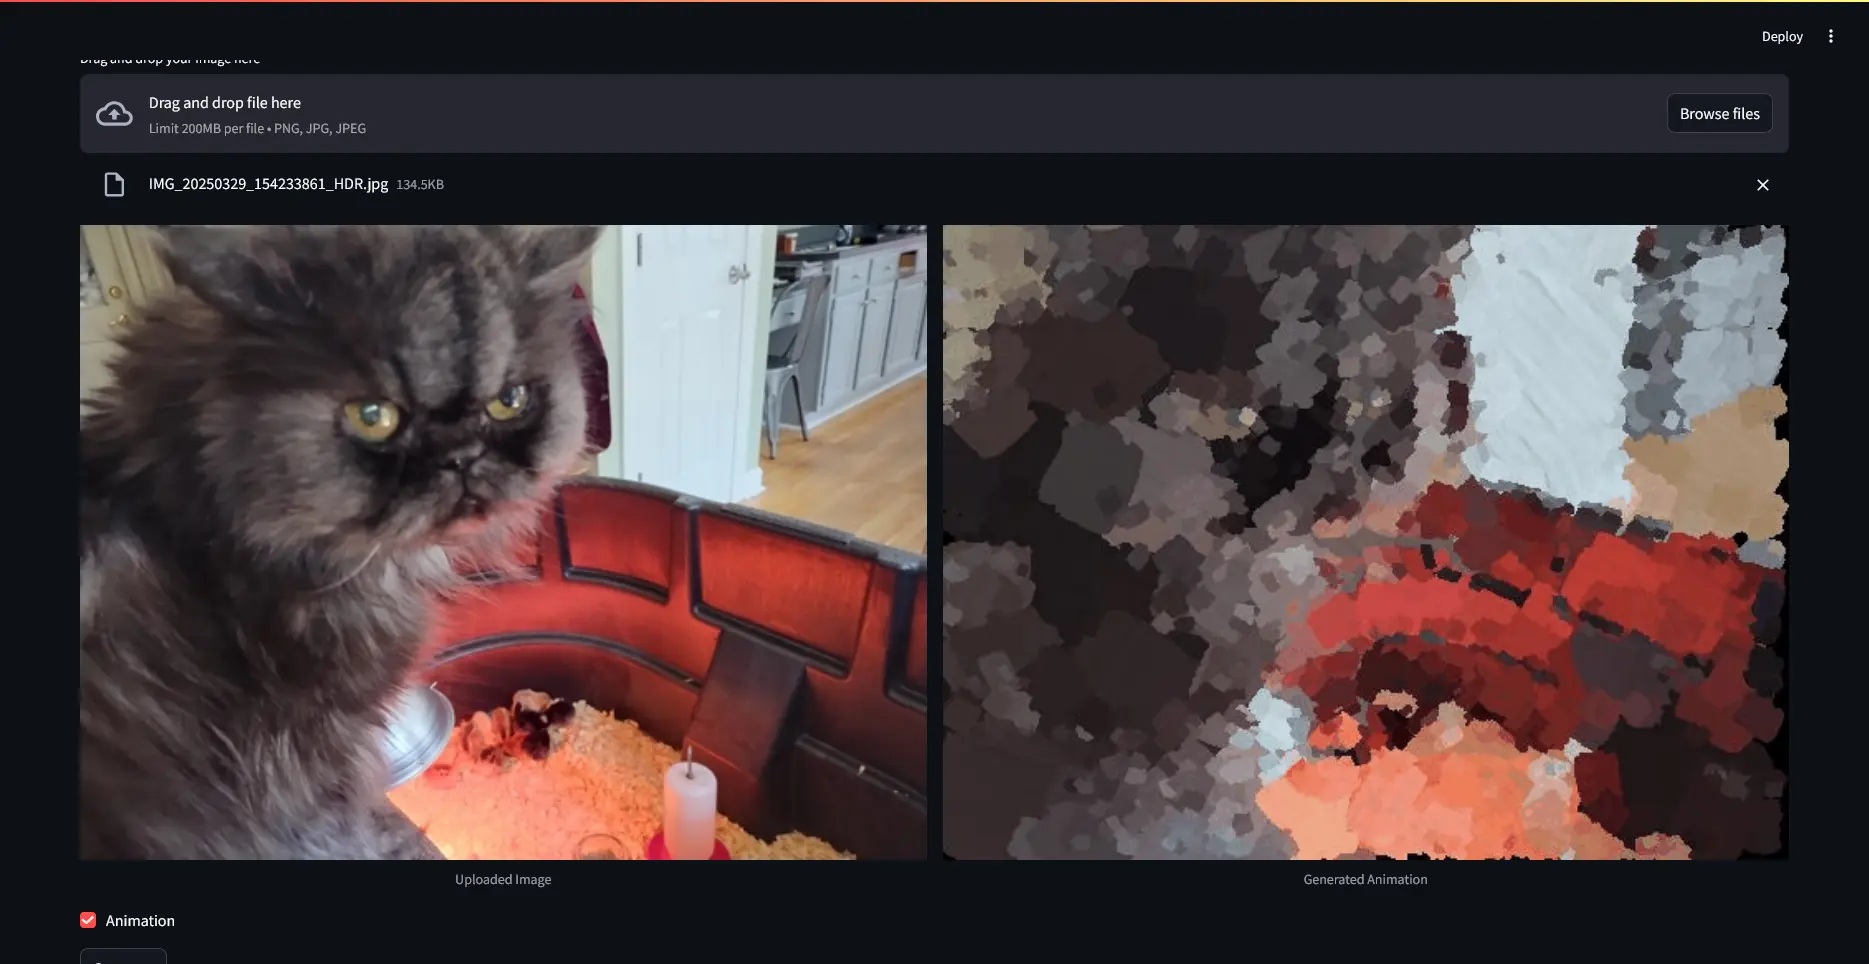
Once you have ColourlessTransformer running, you should drag-and-drop your image onto the little widget that says "Drag and drop file here", press the "Generate" button, and wait. After a few seconds, ColourlessTransformer will output the Paint-Transformed image.
Options
ColourlessTransformer has two options: animation and resizing.
The animation option is really down to the preference and use case. Sometimes it's useful to see the whole process and the timelapse, other times you just want the final result. Enabling animation makes the process take a bit longer because it has to render each frame to a GIF. Enable it if you want, otherwise keep it disabled.
The resizing option is much more clear cut: always use it. I made it toggleable because I want to respect user agency, but there's really never a reason to ever disable the resizing. Firstly, using larger images doesn't really improve the quality of the output. Because Paint Transformer produces abstract blobby images by its very nature, using sharper images doesn't result in a sharper output. Secondly, because of the way that Paint Transformer works internally, larger images require exponentially more processing steps than smaller ones, meaning they take far longer to process. 512x512 images take about 3 seconds to process on my Nvidia 1650 GTX, but 2048x2048 images can take many minutes or even multiple hours. Exponential growth is not to be trifled with.
API Usage
If you want to use ColourlessTransformer programatically in your own projects, I have some documentation on that here, in the ColourlessTransformer README on GitHub.
Conclusion

I love automation. Making computers do things that I would otherwise have had to do is intrinsically satisfying to me. ColourlessTransformer is an especially delightful project for me because it's a rare case of double automation: if Paint Transformer is automatic watercolour, ColourlessTransformer is automated Paint Transformer. Rather than tediously uploading and downloading files to a slow and inconvenient Colab notebook, I can simply type a few commands, drag-and-drop a file, and near-instantly convert an image into an abstract stylized watercolour. I think that's pretty cool.
~Ethan